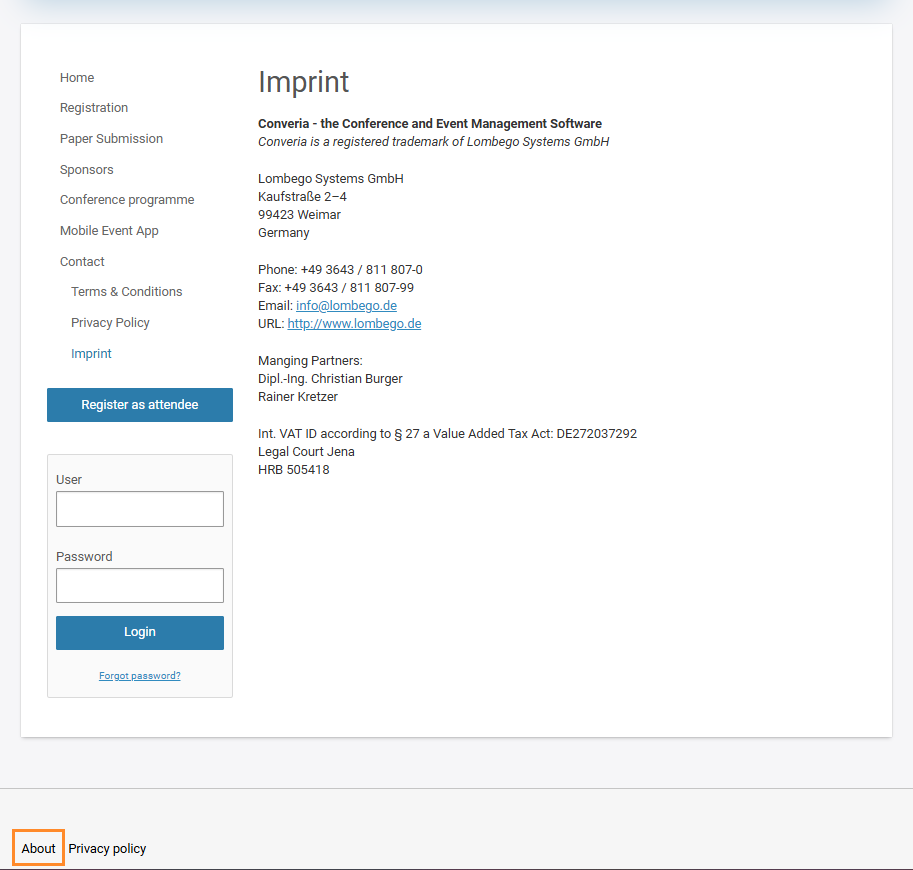
Fig. 1: Additional link to the imprint in the footer
## 1. Create a page structure
CMS -> Navigation -> Page structure
To link the the article *imprint*, there must be a link target that is created in [the page structure](https://manual.converia.de/en/general/your-own-converia-website/page-structure).
* Create a **new folder** (first click on any folder, then click on the *Create new folder* button *,* see Fig. 2) or select an existing folder.
* Create a **new page** in the folder (Fig. 2).
* Set the *action name imprint* so that the page is also linked in the **mandatory query in the footer** (Fig. 3).
* Switch to the *Content* tab to link an article or set up a redirect to an external page or document.
Fig. 2: Create folder / Create page
Fig. 3: Assign action name for new page
## 3. Select content
The Imprint can be provided either as an article created in the Converia CMS or with a redirect to an (existing) external page or document.
### Link an existing article
Fig. 4: Select article
Link a previously created article in the *Content* tab (Fig. 4):
* *Add module* button
* Module type: *Article*
* Module content: Please select an article here if an entry has already been created in the *Articles* menu item.
### Create new article
CMS -> Navigation -> Article
If there is no *article* (= text/content) for the Imprint, [a new one](https://manual.converia.de/en/general/your-own-converia-website/article) can be created (Fig. 5):
* Select the desired *article category* (usually corresponds to the conference name, Fig. 5).
* Create a new entry by clicking on *Add entry*.
* Selection of the element (usually Rich Text Editor (RTE) element)
* Fill the tabs for the active languages with the Imprint. The *Standard* tab serves as a **fallback** if there is **no content** in an active language. **Attention: Even a space is considered content!**
{% hint style="info" %}
If a lot of content is planned in the form of articles, it can be useful to create several folders by creating additional (sub)categories in the parent folder (main category = internal event name), see [#articlecategories](https://manual.converia.de/en/your-own-converia-website/article/add-and-edit-article-categories#article-categories).
{% endhint %}
Fig. 5: Create new article
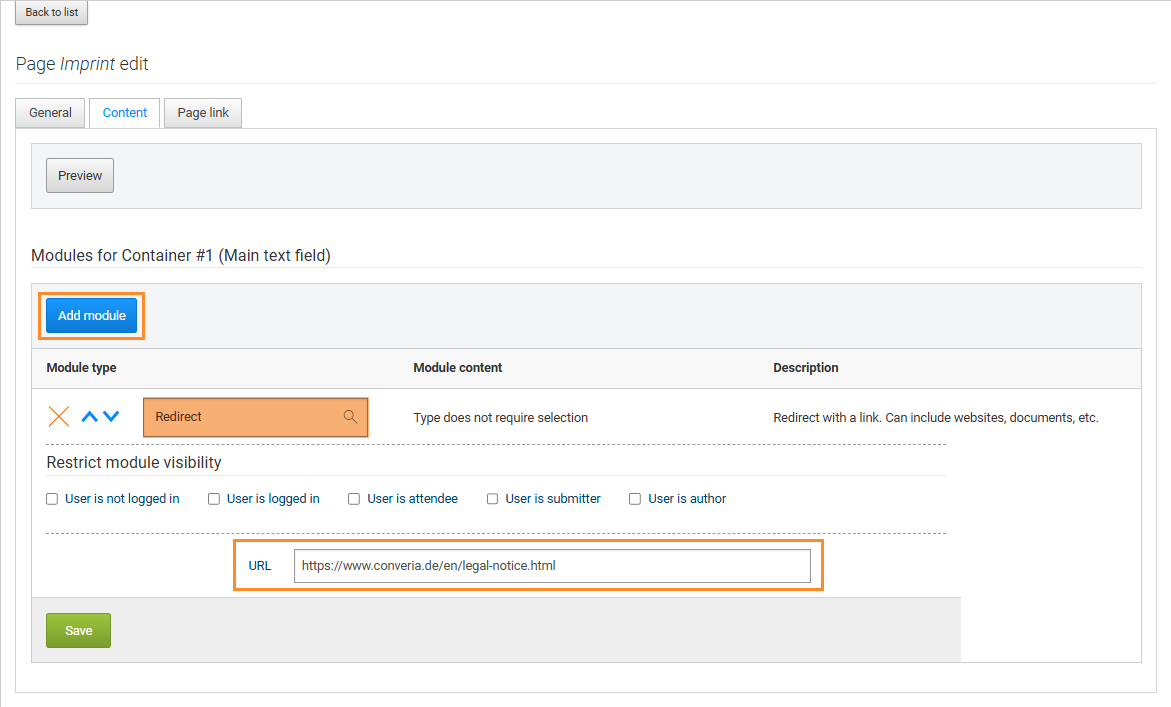
### Redirect
Fig. 6: Enter URL
Enter a redirect to a URL in the *Content* tab (Fig. 6):
* *Add module* button
* Module type: *Redirect*
* URL: Enter the target address of an existing website or a document that can be accessed online.