Reviewer Import

External persons who do not yet have a Converia account are often responsible for evaluating contributions. In order to assign the contributions to the persons who are to take on the role of reviewer and then to inform them from within the system about the start of the contribution evaluation, they must be entered in Converia. This is usually done by importing reviewers. The reviewer import works in exactly the same way as the normal person import, except for some additional information, and is described in detail in this chapter.

Preparation of the import data in Excel

Fig. 1: Import template + reviewer import

To ensure that the importer can process the data correctly, it is necessary to follow the specifications of this import template exactly. The CSV template file can be opened and edited as usual in Microsoft Excel. The two sample data sets can be removed.

Leave empty the columns for which there are no values (do not delete or reorder these columns).

The mandatory information for the data records to be imported is:

  • Surname (Last Name column)

  • Country (Country column) – Use the ISO codes (ISO 3166-2 alpha-2 code list, second column in this Wikipedia list).

  • E-mail address (E-Mail column) – If the e-mail address is invalid, the personal data record will not be imported.

  • Language (column U Lang) – use the language codes DE, EN or FR (only the languages activated for this conference can be used).

  • Short title of the topics (column Y Topic List (Short Name)) - separate the entries with commas and without spaces, using the pattern abc,xyz,123

The short description of the contribution topics can be defined in the contribution topic setup itself:

Fig. 2: Abbreviated description of the article topic

Person data records

Personal data sets can be imported with or without a Converia account.

Import person with account

A data record can be imported with an account by entering a user name (column E User name). The data subjects should be informed that an account already exists for them. Otherwise, there is a risk that the persons will create another account, thereby creating duplicates.

Import person without account

A record can be imported without an account by leaving the E column empty. Affected persons should then be able to define their own password and username by clicking on an activation link that can be sent by email, thus activating the Converia account for the imported personal record. Without this activation via link, a duplicate will be created each time the person logs in at the frontend.

Change the encoding to UTF-8

To ensure that special characters and umlauts are imported correctly, it is necessary to set the encoding of the CSV import file to UTF-8. To do this in Excel, please save the file as “CSV UTF-8 (separated by commas) (*.csv)”.

Fig. 2: Save import data as CSV with UTF-8 encoding in Excel

Importing data into Converia

  • Show preview (no import will be carried out at this point).

  • The following error messages may appear at this step:

    • Invalid email address. > Check the email address in the line indicated. The problem may be a space before or after the email address.

    • Invalid country code. This must correspond to the ISO code. > Check the country code in the line indicated.

    • An inactive language is to be imported. > Change the language in the given line.

    • Wrong number of columns, use the template. > Deleting, moving or adding columns causes this error message.

  • Check whether all data records are displayed correctly. Particular attention should be paid to umlauts and special characters.

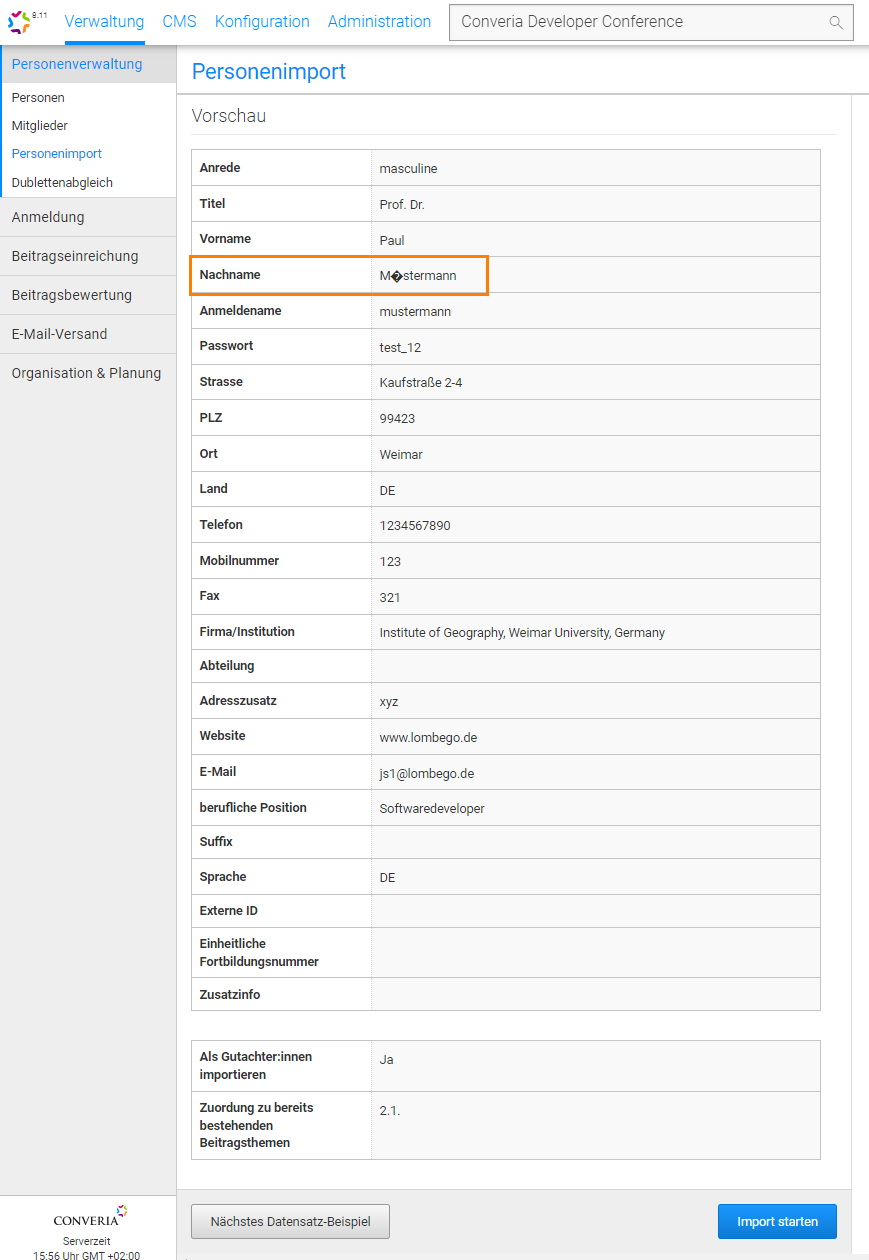
    Fig. 6: Incorrect display of special characters

  • If error messages appear or the display of umlauts and special characters is incorrect, the data records in the import template must be corrected and the conversion to UTF-8 repeated.

  • All records can be checked individually by clicking on Next data record example below (no import will take place yet).

  • Make sure that the records have been imported as valuers. If it says No here, you have forgotten to tick the box in the previous step.

Fig. 7: Final check and import
  • The Start import button only appears under the data records when there are no more error messages.

Fig. 7: Download report
  • Subsequently, a log is created of how the import went.

Last updated

Was this helpful?