
Check-In-Overview
Check-In-Overview
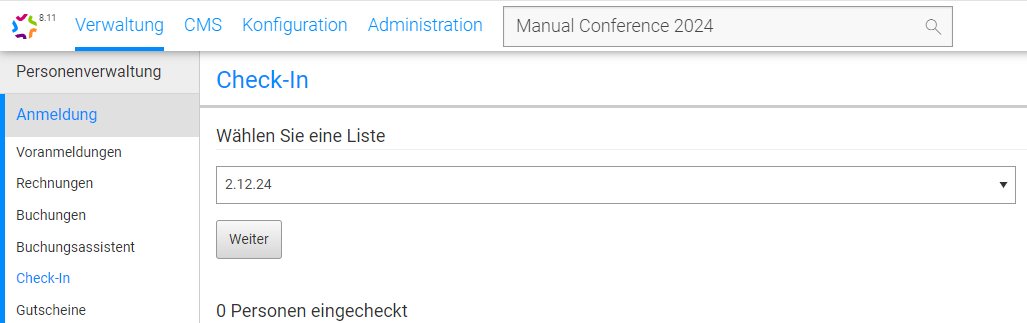
Select list
 Nein → **Ursache beheben**
* Offene Zahlung? → Offenen Betrag hinterlegen
* Nachweis ungeprüft? → Nachweis prüfen
* Mitgliederstatus inaktiv? → Mitgliedsstatus prüfen
* Check-In-Sperre? → Troubleshooting-Counter
Nein → **Ursache beheben**
* Offene Zahlung? → Offenen Betrag hinterlegen
* Nachweis ungeprüft? → Nachweis prüfen
* Mitgliederstatus inaktiv? → Mitgliedsstatus prüfen
* Check-In-Sperre? → Troubleshooting-Counter
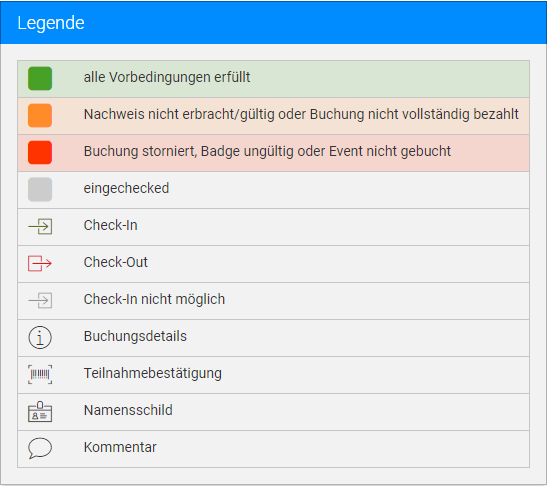
Legend

Enter payment
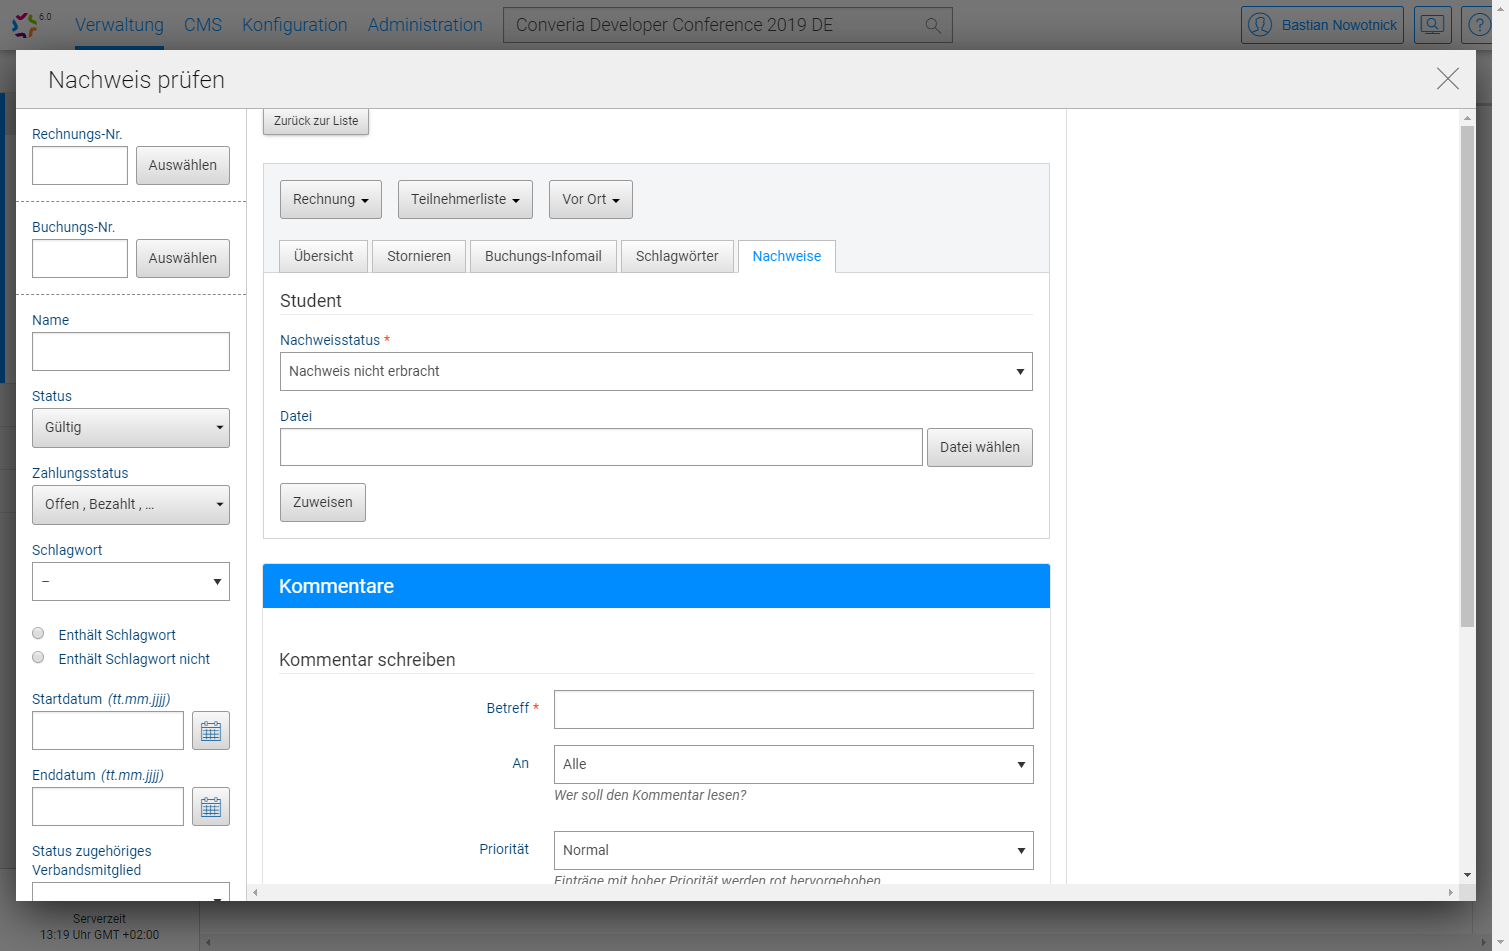
Booking details: Verifications
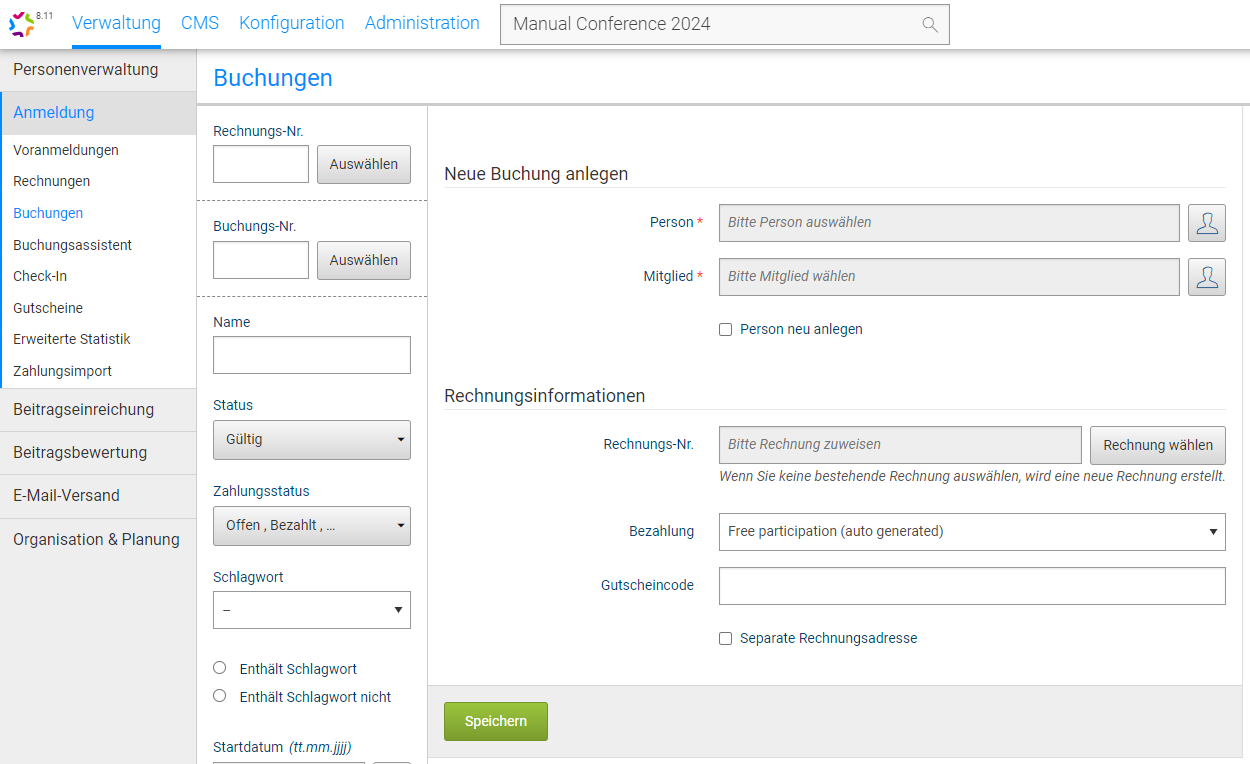
Create new booking

Add booking option
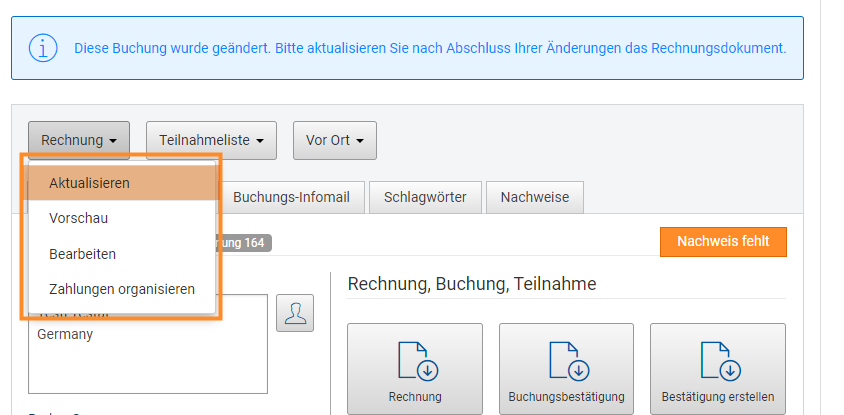
Update invoice
 * Button *Buchungsdetails*
* in der Buchung *Person auswählen*
**Über Menü:**
* *Verwaltung > Anmeldung > Buchungen* 
* Teilnehmende Person über *Namen*, *Buchungsnummer* oder *Rechnungsnummer* suchen
* In der Buchung *Person auswählen*
* Falls nicht als Teilnehmende Person auffindbar, existiert keine Buchung für diese Person → Troubleshooting Counter
* Button *Buchungsdetails*
* in der Buchung *Person auswählen*
**Über Menü:**
* *Verwaltung > Anmeldung > Buchungen* 
* Teilnehmende Person über *Namen*, *Buchungsnummer* oder *Rechnungsnummer* suchen
* In der Buchung *Person auswählen*
* Falls nicht als Teilnehmende Person auffindbar, existiert keine Buchung für diese Person → Troubleshooting Counter

Personal data
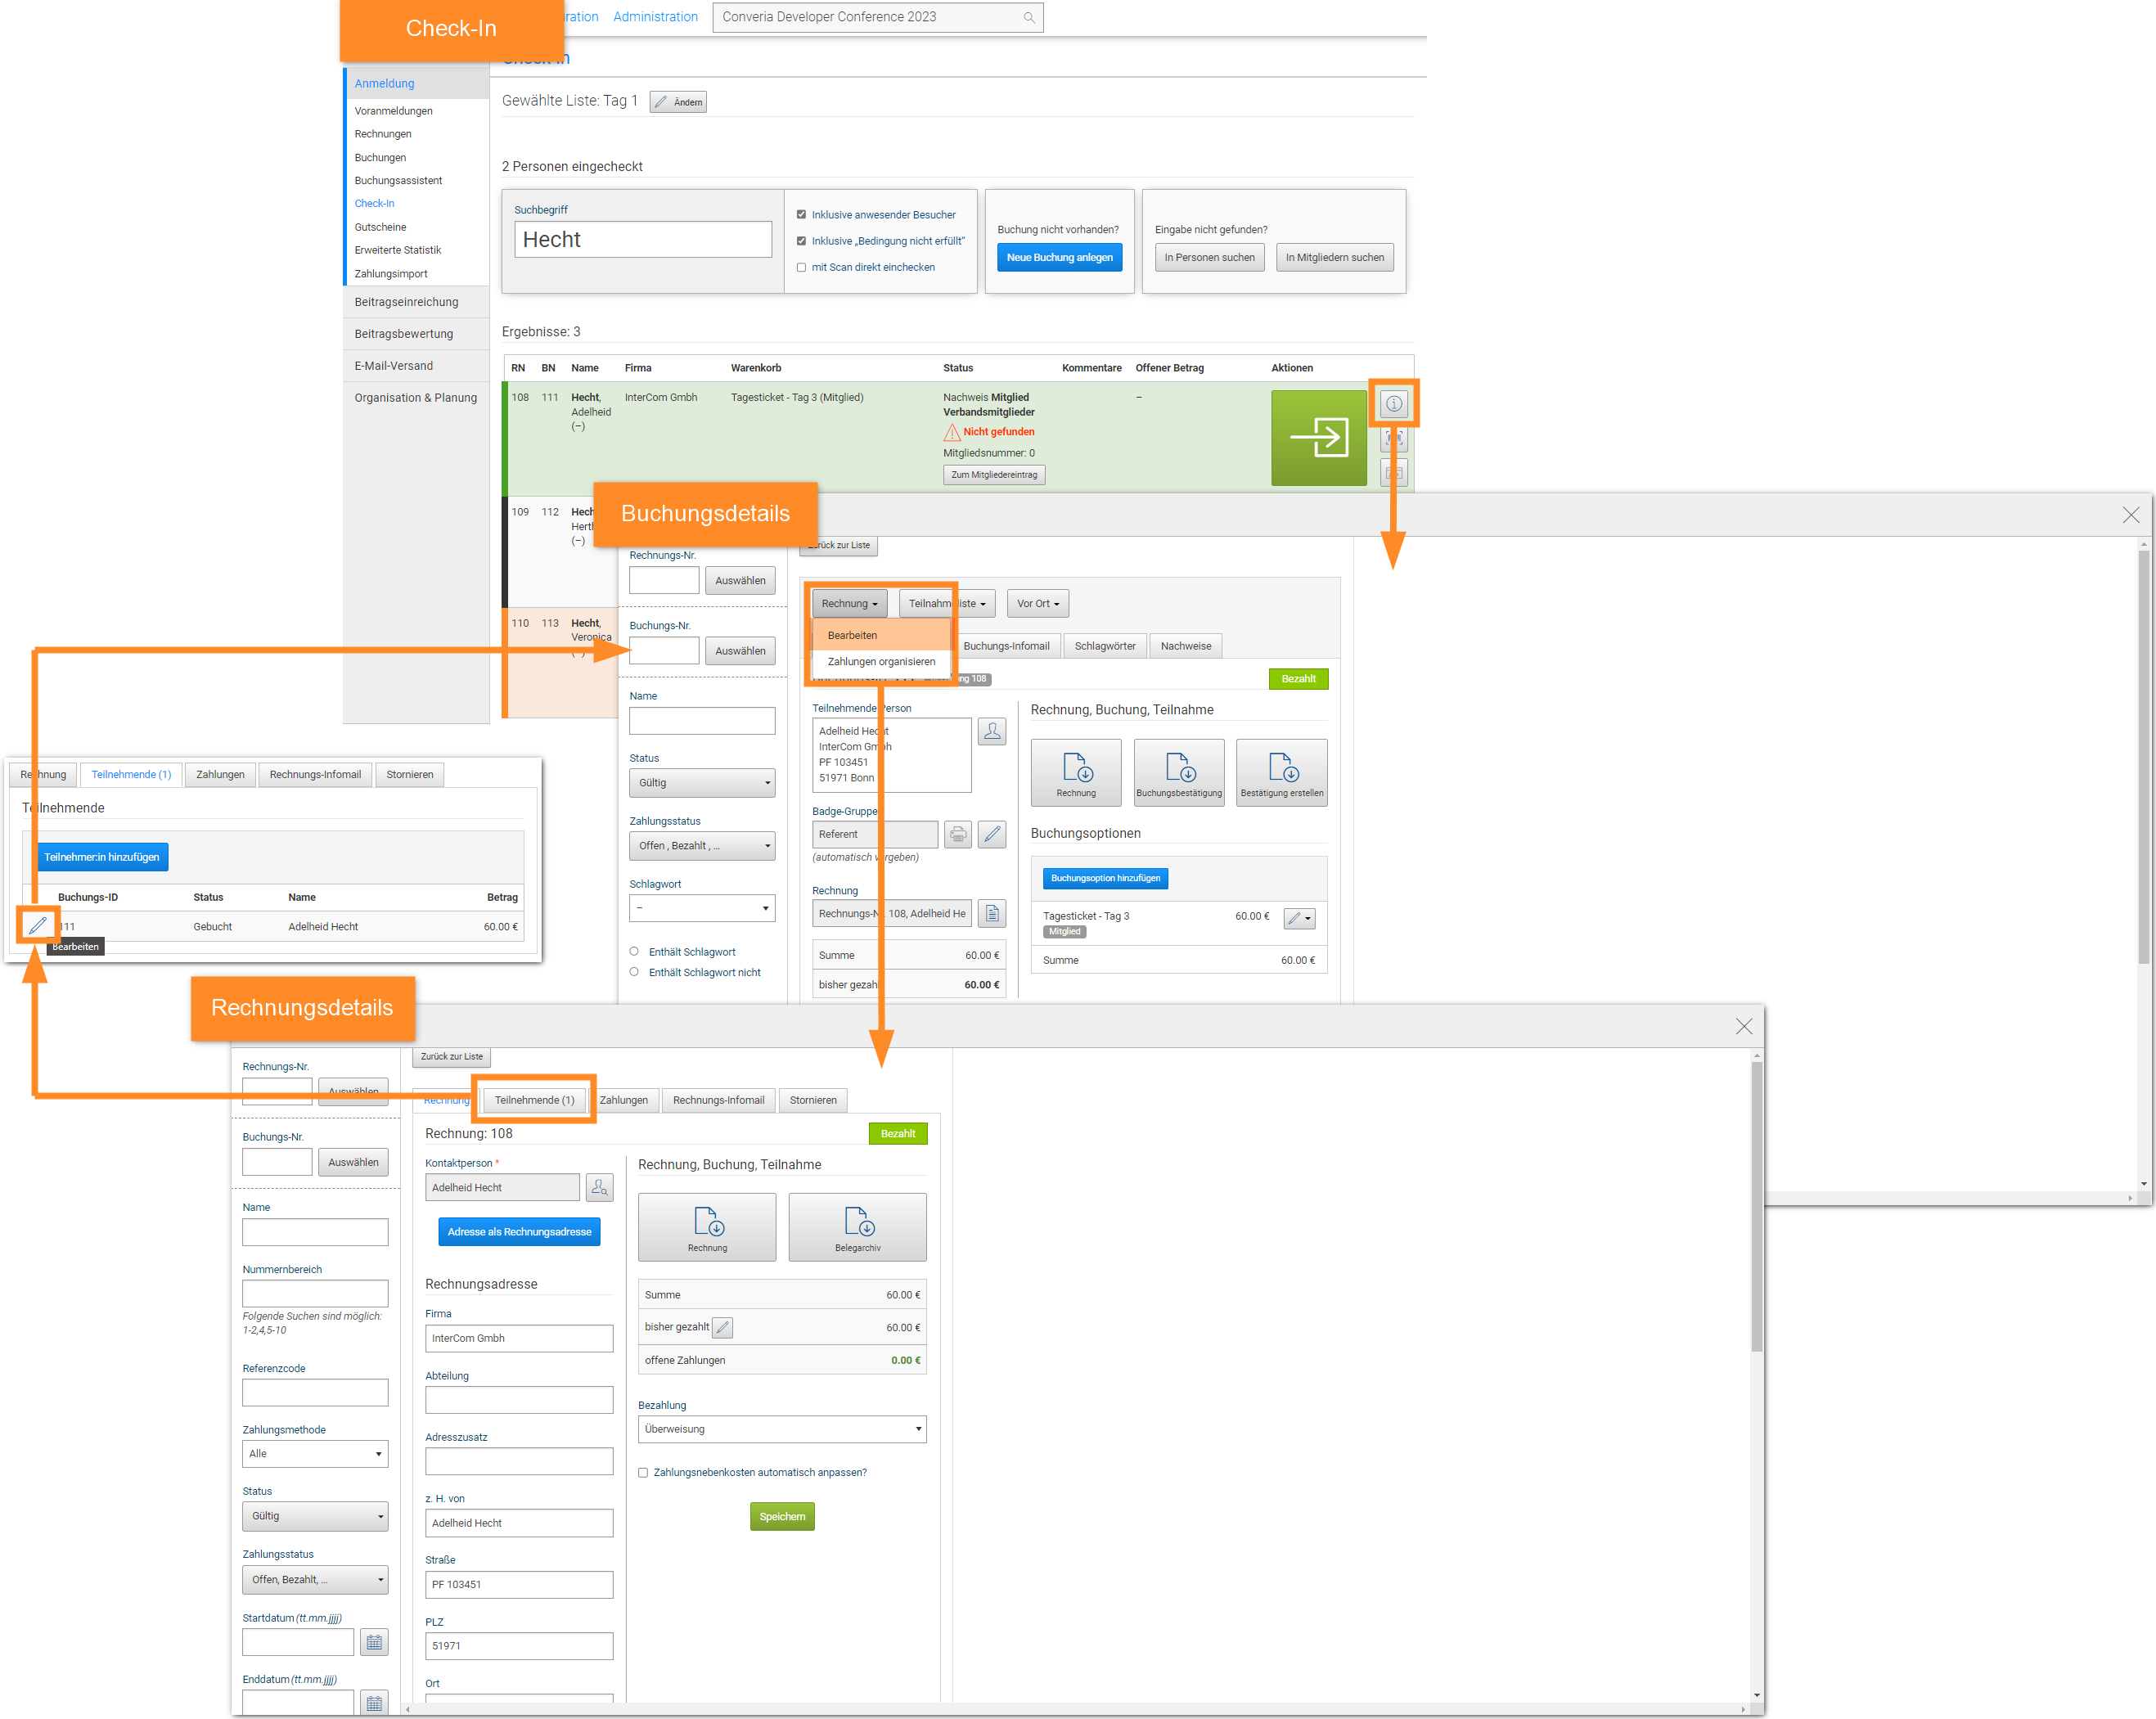
Check-In-Modul <> Teilnehmende / Buchungsdetails <> Rechnungsdetails